
How to Enable Buy Now Pay Later Payment Plans in WordPress
By
|
Last updated on
Do you want to offer Buy Now, Pay Later plans to your customers?
You don’t need to be a financing expert to allow customers to make purchases now and pay at a future date. In this article, we’ll show you how to enable Buy Now, Pay later payment plans in WordPress, step by step.
Why Buy Now, Pay Later?
‘Buy Now, Pay Later’ (BNPL) is a type of short-term financing that allows your customers to pay in installments.
BNPL is a win-win for both you and your customers.
Your customers can start enjoying what they’ve ordered right away without making a full payment immediately. Most Buy Now, Pay Later services like Klarna and Afterpay/Clearpay even provide a 0% interest rate offer if customers complete the payment on time.
For merchants, offering a Buy Now, Pay Later option on Stripe has proven to increase sales by 27%. This offering can also increase the average order value by as much as 45%.
If you think you could benefit from offering short-term financing on your site, but are still hesitant to offer it, then you’re leaving a lot of money on the table.
Adding Buy Now, Pay Later to WordPress

The easiest way to offer Buy Now, Pay Later plans on your site is to use a Stripe plugin like WP Simple Pay.
WP Simple Pay is a complete Stripe payment plugin that lets you start accepting one-time or recurring payments in WordPress without having to set up a shopping cart. Over 15,000 customers across the world are already using it to collect payments for their services, single products, or donations.
WP Simple Pay supports 2 different short-term financing services: Klarna and Afterpay/Clearpay.
Here’s a preview of the Klarna payment flow that we’re going to create with this tutorial.

Alternatively, if you want to use Afterpay, here’s a preview of the Afterpay payment flow we’ll be creating with this tutorial:

Before we begin, please note that in order to accept Stripe payments on your site, Stripe requires your site to be using SSL/HTTPS encryption. Don’t worry if you don’t have an SSL certificate yet, please see the step-by-step guide on how to add SSL in WordPress.
Step 1: Install and Activate WP Simple Pay
The first thing you’ll need to do is to install and activate the WP Simple Pay plugin. If you’re installing a WordPress plugin for the first time, see this step-by-step guide on how to install a WordPress plugin.
Remove the additional 3% fee!
Most Stripe plugins charge an additional 3% fee for EVERY transaction
…not WP Simple Pay Pro!

If you didn’t see the setup wizard, simply head over to WP Simple Pay » Settings » Advanced tab and click the Launch Setup Wizard button.
Step 2: Connect WordPress to Stripe
To connect your WordPress site to Stripe, click Connect with Stripe.

Next up, enter the email address you use for your Stripe account and connect it with your site. If you don’t have a Stripe account, you can easily create one by entering your email address and completing registration.

Upon completing this process, you’ll be shown a success page that says Setup Complete. Next, to create a payment form, click on the Create a Payment Form button.

Step 3: Create a Buy Now, Pay Later Form
So far, you installed WP Simple Pay and connected your Stripe account to your site. The next thing you’ll need to do is to start creating a payment form.
You can now see a few different form templates that let you accept payments on your site. If you’re not on this page yet, you can navigate to WP Simple Pay » Add New to start creating a payment form.
As mentioned above, WP Simple Pay supports 2 different Buy Now Pay Later services: Klarna and Afterpay/Clearpay.
Klarna is currently available to Stripe merchants in the following countries: Austria, Belgium, Denmark, Estonia, Finland, France, Germany, Greece, Ireland, Italy, Latvia, Lithuania, Netherlands, Norway, Slovakia, Slovenia, Spain, Sweden, United Kingdom, and the United States.
Afterpay/Clearpay is currently available to Stripe merchants in the following countries: Australia, Canada, France, Ireland, Italy, New Zealand, Spain, United Kingdom, and the United States.
The best part is that with WP Simple Pay, you can set up a payment form that integrates with either Klarna or Afterpay/Clearpay in minutes. There’s no application, onboarding, or underwriting process to get started.
If you want to create a payment form that integrates with Klarna, select the Klarna (Buy Now, Pay Later) Form template. Otherwise, select Afterpay/Clearpay (Buy Now, Pay Later) Form.

The rest of the configurations are similar for both Klarna and Afterpay/Clearpay forms.
You’ll now be asked to configure your form. Feel free to change the title and description of your form.

By default, the Type will be chosen as On-site Stripe Checkout form. You can change it to off-site payment form if you need. When on-site payment form is chosen, you can even configure it to open the form in an overlay method.
If you’re not sure which type you should choose, check out our article On-site checkout vs. hosted checkout.
WP Simple Pay lets you easily customize your payment success page. You can either choose a Specific Page from your site or if you want to redirect users to a third-party site, choose Redirect URL.
Next, choose the Payment option on the right and you’ll see the default price, which you can edit per your needs.
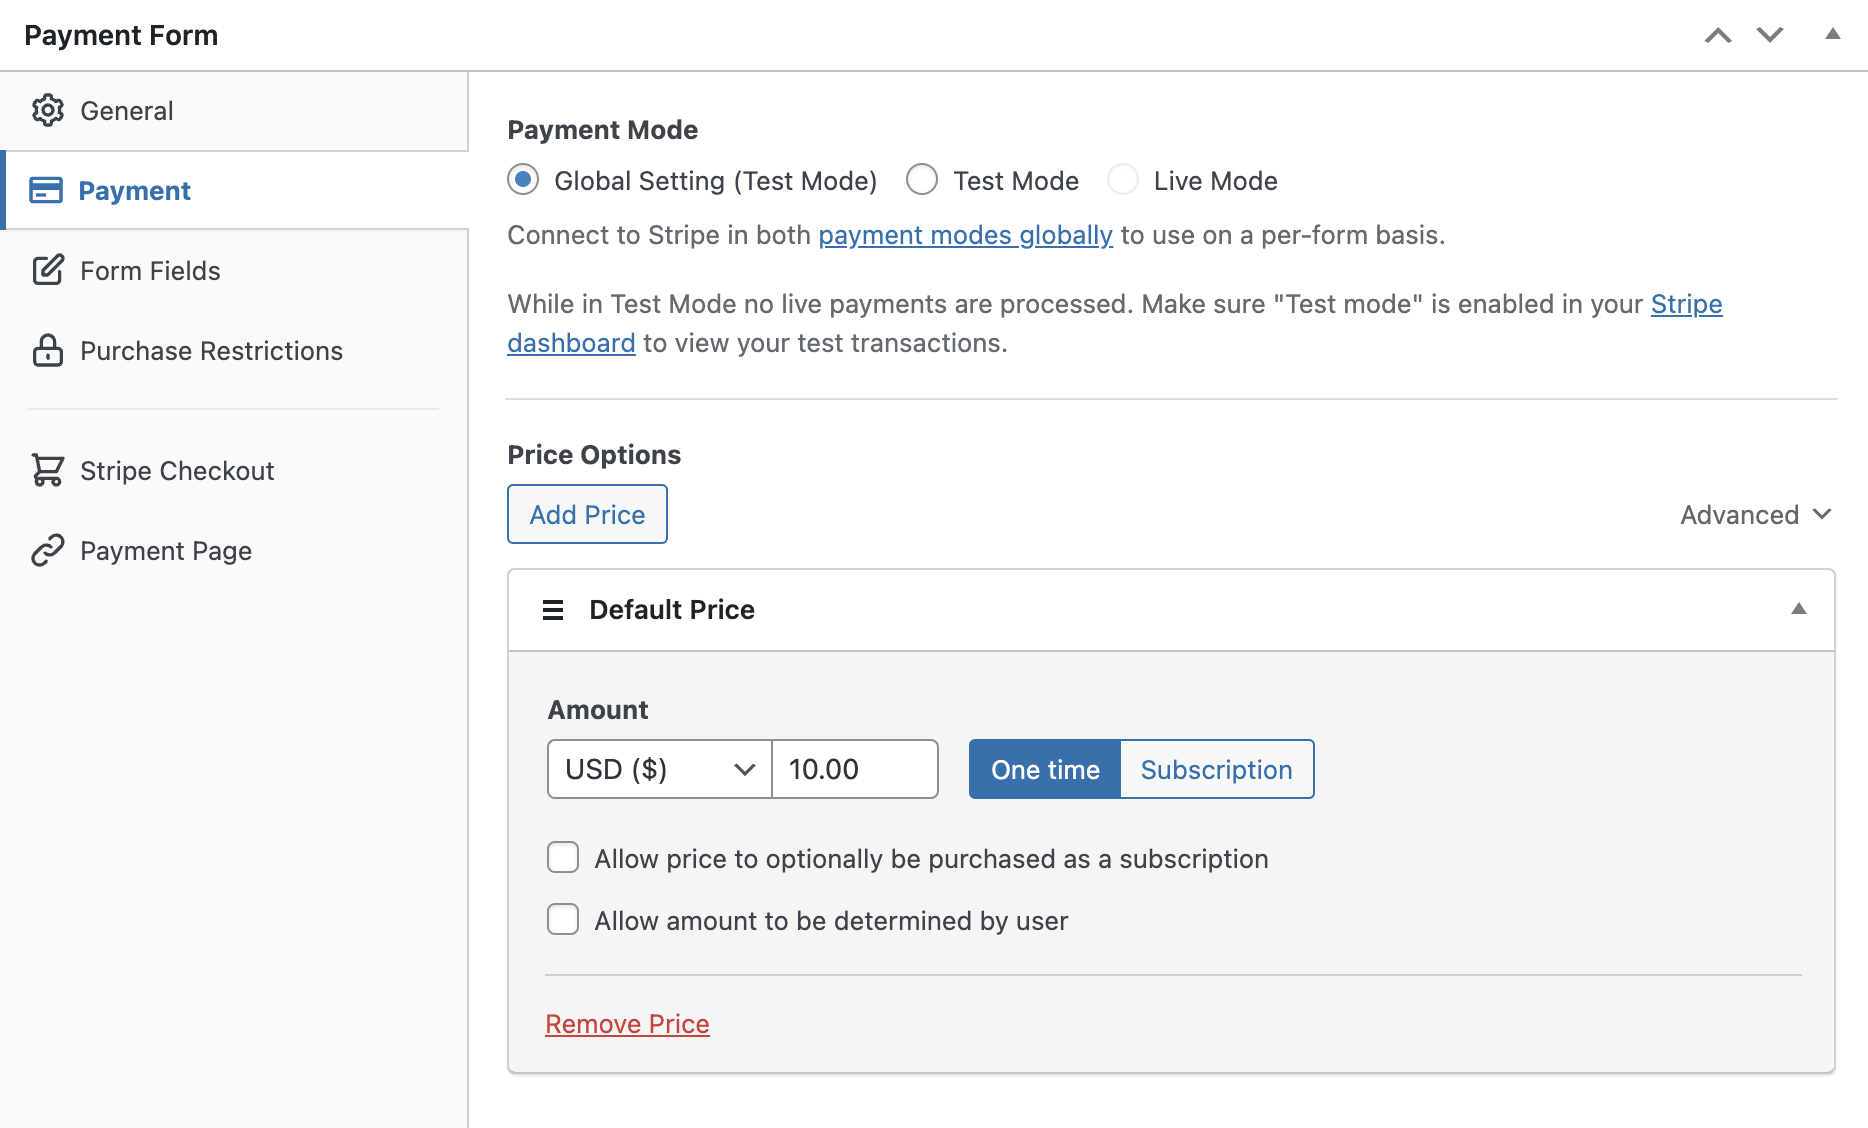
Important: For now, let’s NOT switch the payment mode to Live Mode. Once the form is completely set up, you can do a test payment. And then you can switch the mode to Live if everything works fine.
On this page, you can also change the currency and amount.
Next, click on the Payment option from the right and you’ll be able to customize the currency, amount, and even choose between one time and subscription payment.
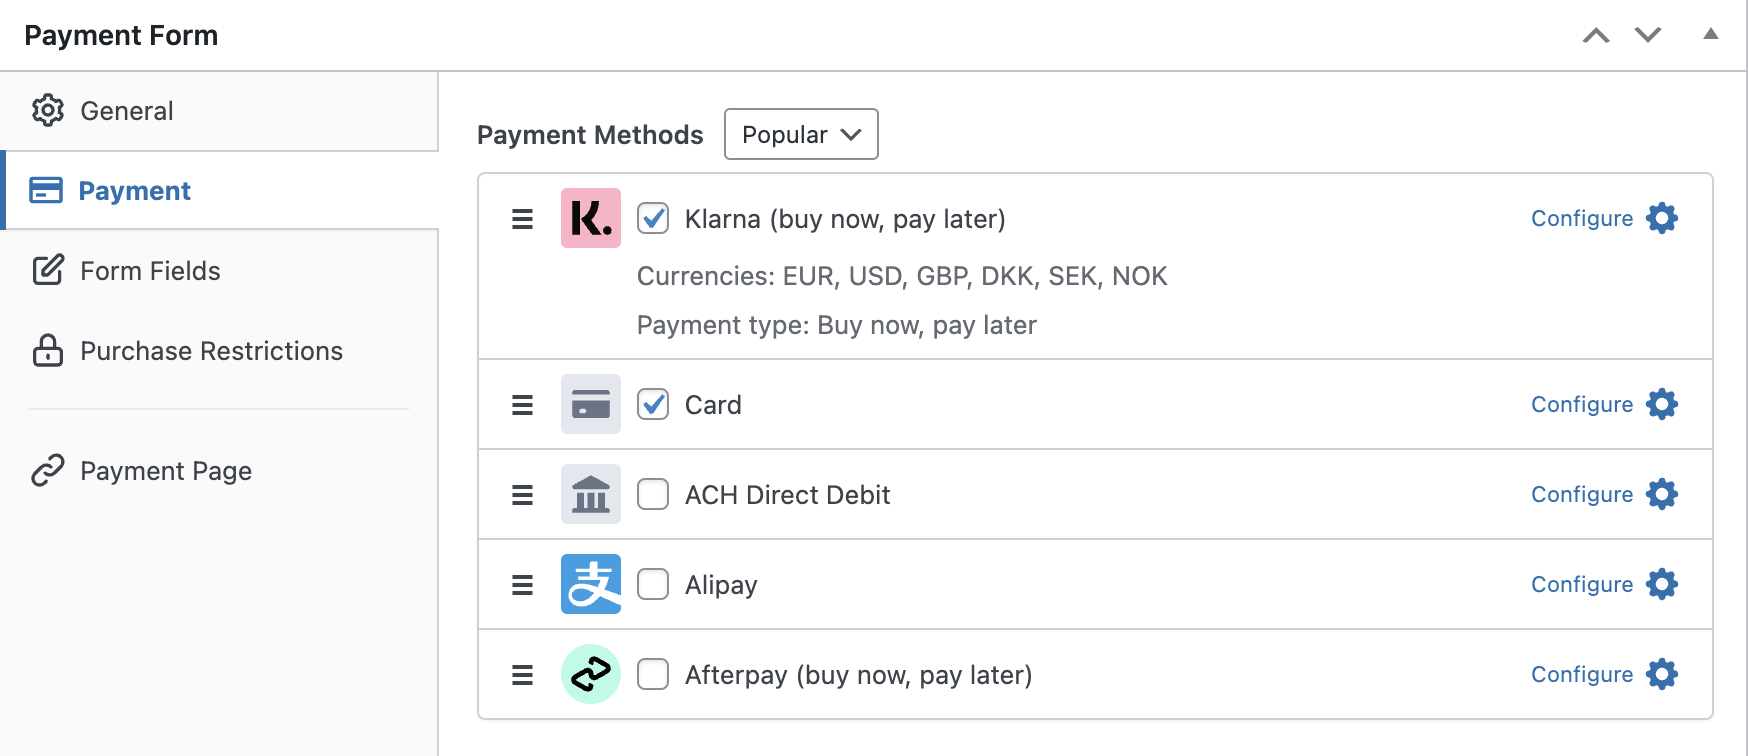
Make sure your preferred Buy Now, Pay Later service is selected as your payment method under the Payment Methods section—that is, either Klarna or Afterpay/Clearpay.
Step 4: Publish Your Buy Now, Pay Later Form
Now that your payment forms are ready, it’s time to embed and publish your form on your website.
As always, don’t forget to test the form first before it goes live. You can toggle your entire site or individual payment forms between test and live modes (read more about Test mode).
To embed the form, go to the post or page where you want to publish it. Then click on the + icon to add the WP Simple Pay block.
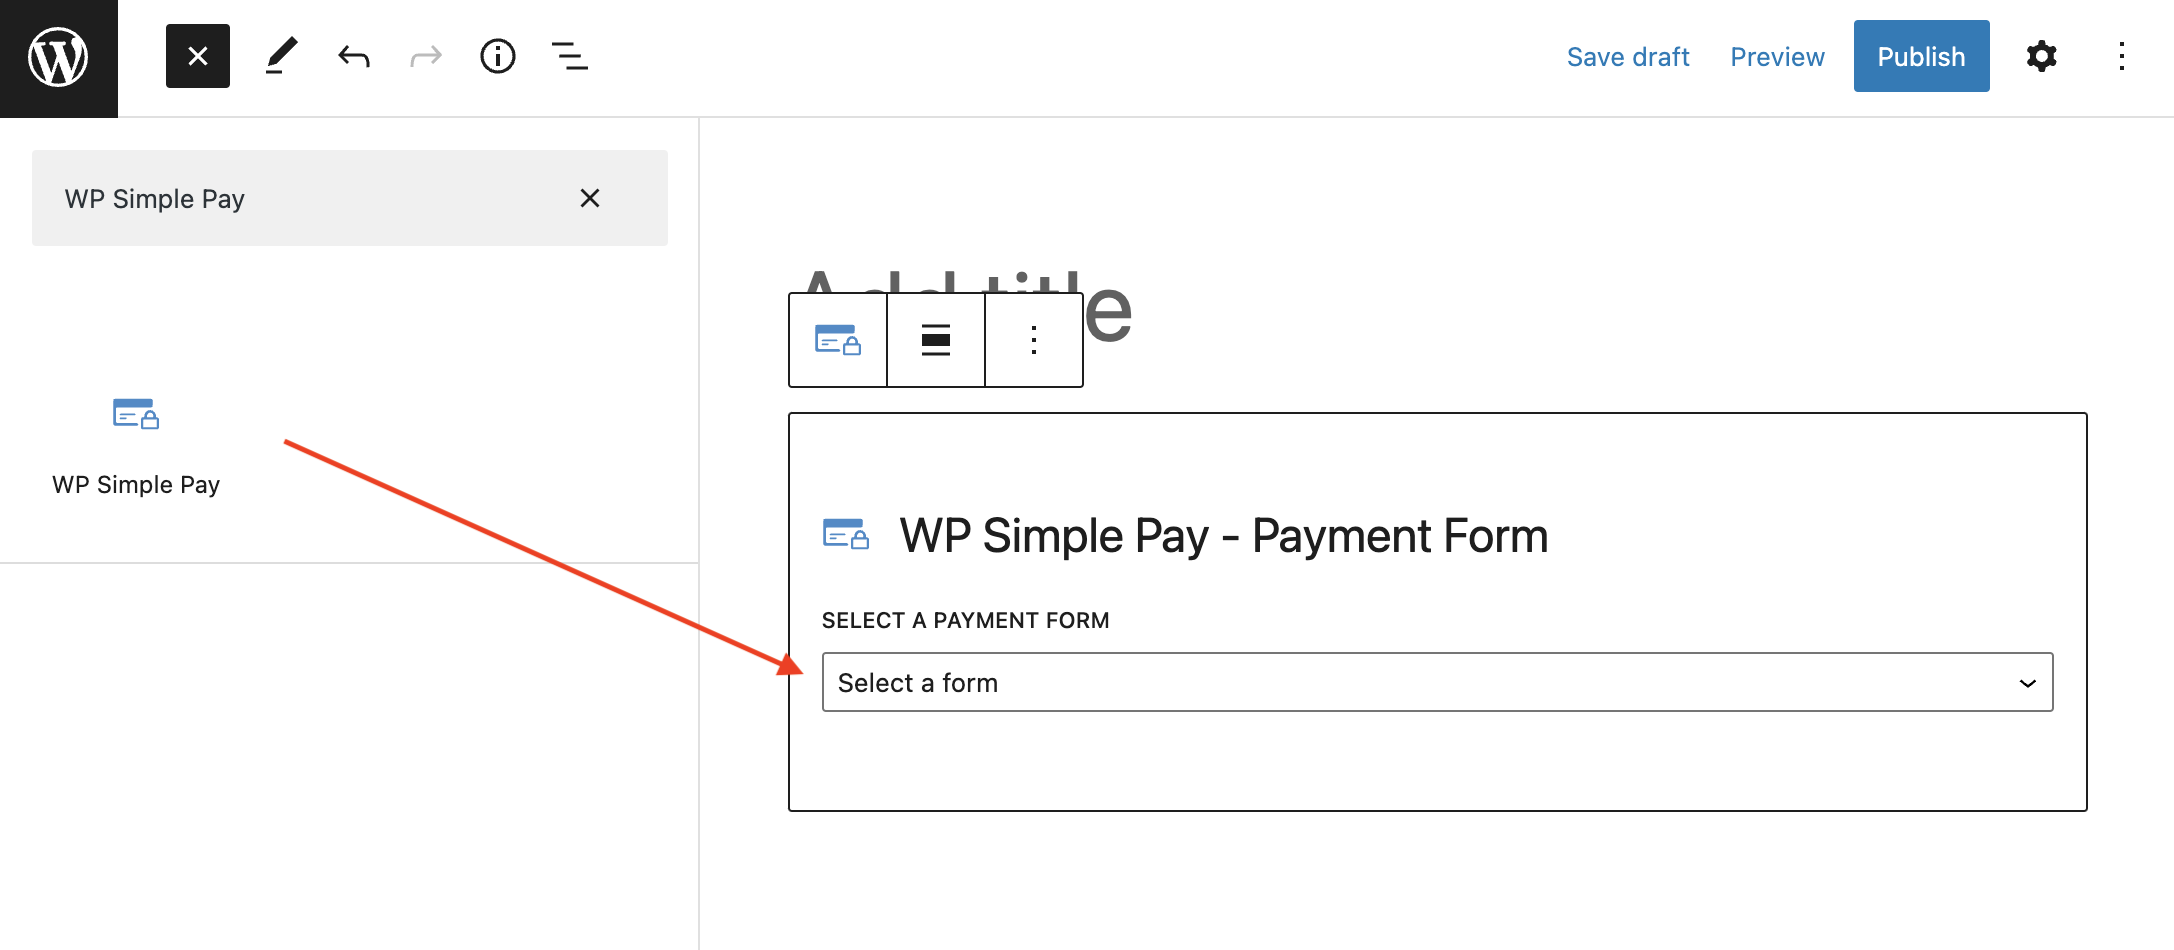
Then choose a form you just created. And then, click Publish or Update.
That’s it!
I hope this article helped you learn how to accept Buy Now, Pay Later payments with Stripe in WordPress.
If you liked this article, you might also want to check out the following articles:
- Top complaints customers make about online forms
- How to reassure your users their payment data is safe
- 9 things you didn’t know about Stripe
What are you waiting for? Get started with WP Simple Pay today!
To read more articles like this, follow us on Facebook and Twitter.

Leave a Reply